Quick Corners
Have you heard of Quick or magic corners? You probably already know how to make them, but my Guild Bee is doing a Block of the Month. They will be using this technique, so I thougth I would do a quilt picture tutorial. Refreshers can be fun! Be sure to let me know if you have a different way to do these...or maybe a tip. I love to see how others do things. You never know when something will be YOUR 'ah HA' moment! Here we go.... (this is easy!...)....

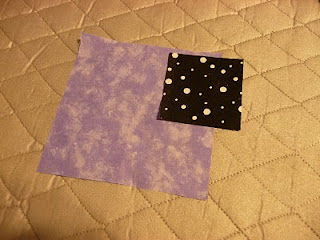
Your pattern will call for 2 square. The large one is background. The small one will be the corner triangle.

On the back of the smaller square, mark the diagonal. you can use pencil if it will show enough for you to see, or sometimes I use a chalk marker. This will be your seam line.

place the smaller square in the desired corner of the larger square. On some projects or with directional fabrics, you will need to pay attention to this step. (ask me how I know!). Sew on this line.

Trim corner edge to 1/4 inch. Put the 1/4 inch line on the seam line to get a nice seam allowance. (some quilters wait to do this step after ironing : to make sure they have enough fabric in the corner. Some quilters do not trim.)

Iron your triangle out. You may iron the seam allowance to the triangle or to the background.
magic! No triangle were harmed in the making of this tutorial!
Thanks for visiting my blog. Tomorrow I will show how to piece batting. (I feel frugality coming on! Anita will be SO proud!

Your pattern will call for 2 square. The large one is background. The small one will be the corner triangle.

On the back of the smaller square, mark the diagonal. you can use pencil if it will show enough for you to see, or sometimes I use a chalk marker. This will be your seam line.

place the smaller square in the desired corner of the larger square. On some projects or with directional fabrics, you will need to pay attention to this step. (ask me how I know!). Sew on this line.

Trim corner edge to 1/4 inch. Put the 1/4 inch line on the seam line to get a nice seam allowance. (some quilters wait to do this step after ironing : to make sure they have enough fabric in the corner. Some quilters do not trim.)

Iron your triangle out. You may iron the seam allowance to the triangle or to the background.
magic! No triangle were harmed in the making of this tutorial!
Thanks for visiting my blog. Tomorrow I will show how to piece batting. (I feel frugality coming on! Anita will be SO proud!

Comments
Have the whole group do the same thing. Gather everyone's little leftover squares to be made into a group memory quilt. Let everyone sign their little squares before the leftover quilt is made and then have a drawing to see who gets it.
Each finished little square given to the project is a chance to win the memory quilt.
I hope I explained that right.